Wednesday, October 17, 2018

The Firefighter Academy--Day 4

I wake up at 3:30 (sorry, 0300 hours) this morning with the chief's voice in my head, "The next time I ask, I want to hear each of you." His question? "What are our priorities?" We found out from our captain after that uncomfortable silence of no one knowing that our priorities are: FLIP. Firefighter, Life, Incident control, and then Property. So, this is what I wake up to. This acronym on a loop.

The Tuesday night academy seemed like we were getting the hang of things. My first night as class lead went okay even though I never felt like I knew what I was supposed to be doing. I felt for the first person assigned the role, as it seemed like a glorified hall monitor role with being the contact person for bathroom needs and making sure that we always go in pairs--two in, two out. I dropped the ball a couple myself of times tonight by leaving my partner behind, as I hurried off to try and keep up. Lead by example and do better on Friday.

Regardless of my mind telling me to keep the dinner quantities under control, I didn't. It was all so good. Pam and I went to a Rhody Club pre-meeting dinner at Ichiban's Restaurant before the academy session. I had to leave early, but not before filling up with too much food. This made everything go really slow. My body felt as though it were swimming in mud as I tried to get my gear on at the beginning of drill. I went from slow to slower. Then in my frustration with my slowness, I began forgetting pieces of the process.

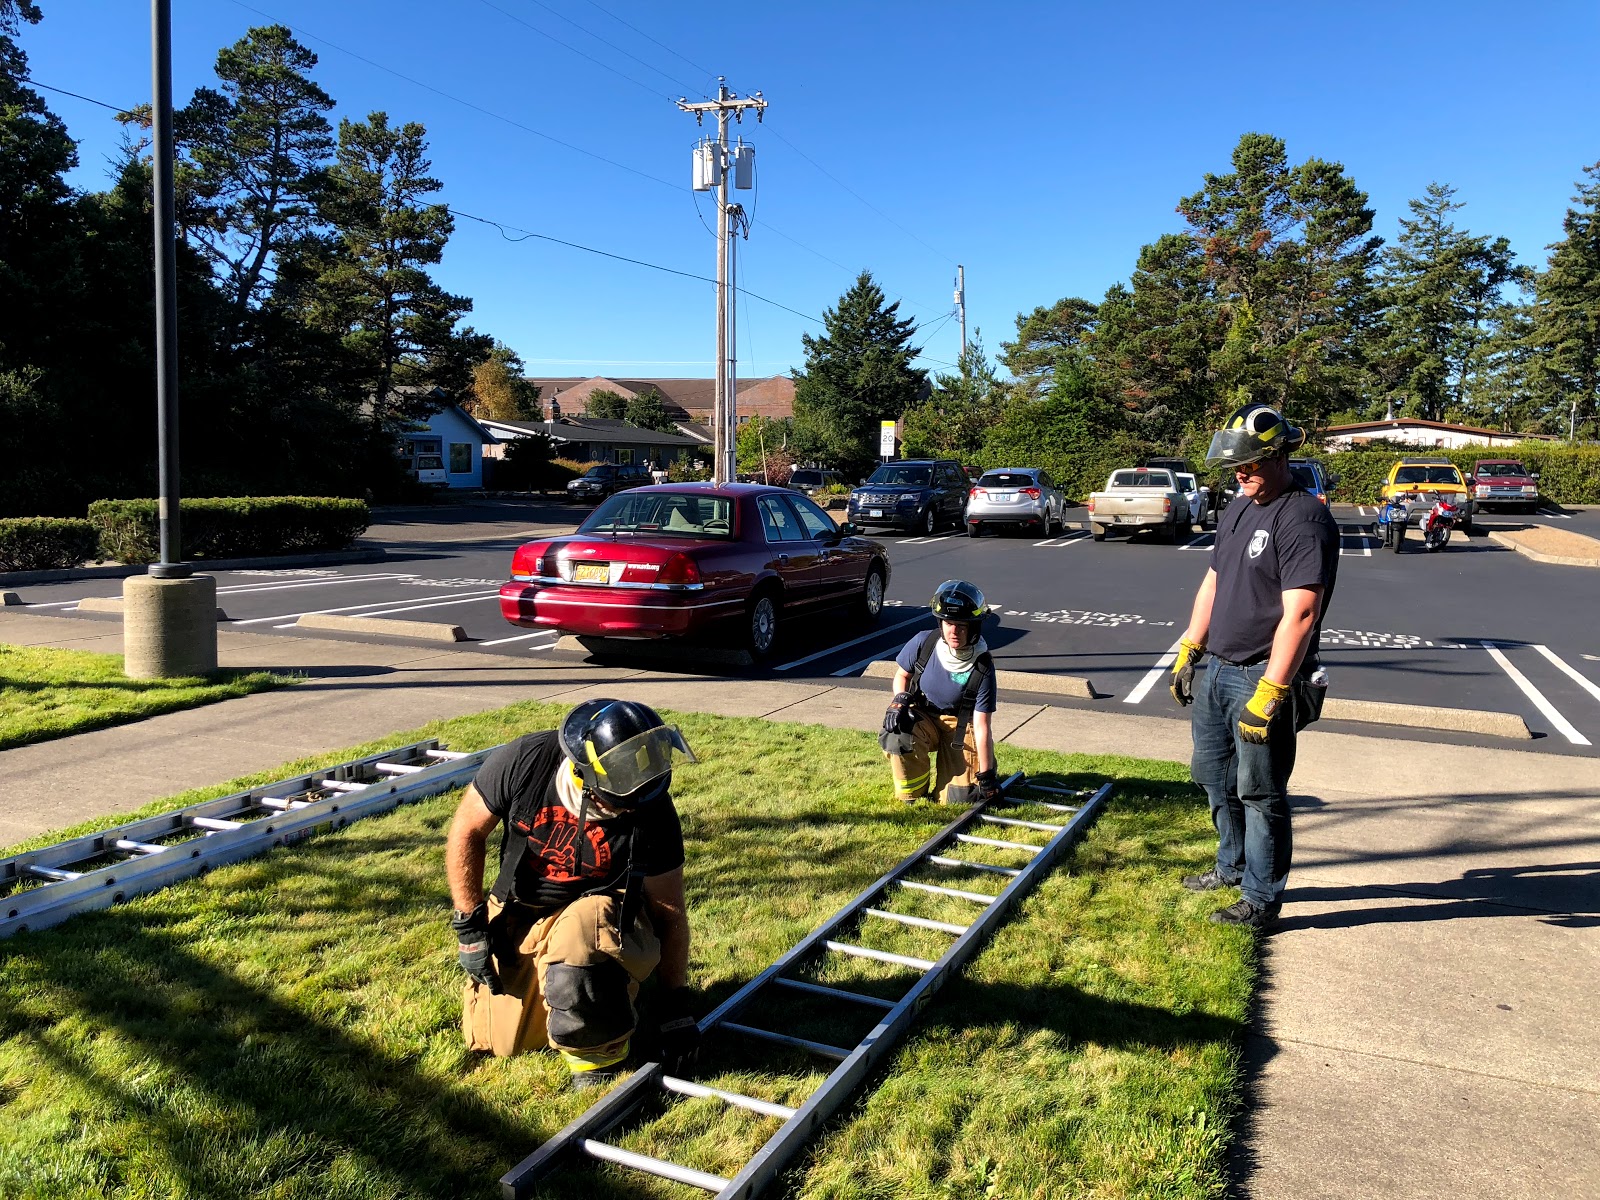
Next, we split the team into two groups. One went on the truck--oops, engine (I've been told, but I can't remember how to tell the two apart)--to work on hydrant hook-ups and the rest did ladder work. I started off in the ladder group.

My ladder partner from Sunday asked me to help her with getting the 24 foot extension ladder off of Engine 7, which was a nice vote of confidence that she would want to work with me on ladders again. Low shoulder carry is the preferred method for carrying longer distances. Working in teams of two, we went through setting up the extension ladder. Who'd a guessed that there would be more to it than the usual brute force struggle method I've been using for most of my life. Let me try and explain the new approach.

The first thing you notice right away is that there are two people doing this process. This makes it easier, safer and a lot more graceful. Communication is key though. The person at the head of the ladder has the control and calls out the directions, such as how it's going to be raised (flat or beam). Both people check for aerial obstructions, such as power lines. I think most of us went with the flat raise, where the ladder is raised parallel to the building face. The beam raise is with the ladder perpendicular.  Either way, the fly portion of the ladder--the part that goes up--will be facing the building when it is raised. This seems weird, but makes sense when you see the whole process. The person at the spurs, which is the part that stays on the ground, now stands on the bottom rung of the ladder and holds onto the halyard (rope that goes to the pulley and is used to pull up the fly along the bed) as the person at the top of the ladder calls out that they are raising the ladder. "RAISING LADDER." Echoed by the person at the foot of the ladder. "RAISING LADDER." Using their weight as a counter-balance, the person at the foot makes it easier for the person at the top of the ladder to lift the ladder and slide their hands down the beams pushing the ladder up to a standing position. The foot person places their right foot firmly next to the beam and the top person quickly stands on the bottom rung with their left foot while running their right foot down the beam to hold it firm. We haven't even got the ladder to the wall yet.

Next, raise the fly. Untie the halyard. Check for aerial obstructions. Pull the halyard to raise the fly. "RAISING FLY." Echoed by foot person, "RAISING FLY," so that they know to make sure their fingers are out on the beam and not where they are going to be caught between the rungs. How far up depends on the situation--window rescue, roof access, etc--which is more detail for later. Catch the dogs on the desired rung.  "ROTATING ON BEAM," the top person calls out as they point to the beam that will be the pivot point and holding onto the halyard. "ROTATING ON BEAM," echoed by the foot person. The ladder is flipped, so that the fly is now away from the building. The top person now stands on the bottom rung acting as a counter balance, while the bottom person gently lowers the ladder to the wall. The top person now ties off the halyard with a clove hitch and a safety half-hitch.

You think we're done here, but not so fast. We have to make sure that the ladder is safe to climb. The top person does a safety check and calls it out as they are doing it. "TIPS SQUARE." "DOGS SET." "HALYARD SECURED." "SPURS SOLID." "CLIMBING ANGLE GOOD." The climbing angle is checked by sanding on the bottom rung and extending the arms out level to the rung while the body is vertical. This way ensures that the ladder won't be too steep even when the firefighter is climbing wearing an air pack. Now, we are ready to climb. "FIREFIGHTER CLIMBING." Echo, "FIREFIGHTER CLIMBING." As the top person is climbing, the bottom person rotates around to the front of the ladder and places their feet firmly on the beams with their hands on the beam watching the other firefighter climb. "FIREFIGHTER COMING DOWN," is call in the opposite direction. You guessed it. Echoed by, "FIREFIGHTER COMING DOWN," from the bottom person.

We got to climb the ladder to the top of the second story wall of the firehouse, which was just at the edge of the 24 foot ladder's reach, without and with the air packs. Pretty exciting stuff even though I've climbed a lot of ladders in my life.

The fire truck--correction, engine--is here to pick us up to take us to the next drill, which is hydrants.

If you ever see those little blue reflectors on the roadway, they are there to indicate where there is a fire hydrant. This is still a mystery to me as to how you are supposed to see these things or just a hydrant while racing to fire situation and know where to stop the engine so that things can be hooked up in such as way as to actually try and put out the fire. I am holding some faith in the process that this will become clear in time. For now, we are just going to learn how to set up the hose on the hydrant. In theory, the engine will stop near an acceptable hydrant that is close enough to the structure that has a fire to be useful.

A firefighter on the driver's side will get out and open the first cabinet to get the hydrant tool and the bag of fittings. As the firefighter passes the rear of the engine, they will grab the line holding the 4-inch supply line and drag it towards and past the hydrant to enable the hose to be wrapped completely around the hydrant and cross the supply line at a 90 degree angle. A foot is placed firmly on the supply line at the point where the hose crosses itself. The firefighter then signals for the driver to advance towards the fire. Once the first connection at 50 feet hits the ground, the firefighter can safely begin connecting the fittings to the hydrant because there is now enough weight of the hose on the ground to pretty much ensure that the supply line will be pulled from the engine bed.

The hydrant wrench can never--NEVER--be left on the ground. The sand will devour it and it will never be seen again.

After making sure that the two side caps are on securely, the main cap is removed. The hydrant is then flushed to make sure any sentiment is washed out. The valve is then shut again. The adapter is screwed onto the main port and then the cap closest to the fire or in the direction of the fire is removed and a secondary gate valve and adapter for a three inch hose is attached. Make sure that the gate valve is shut. Unwind the supply line and straighten it out, because once it's full of water it won't be able to be moved. The main four inch hose is then attached to the adapter on the main port.

The signal is now given to the engineer that the water is available to be turn on. This is done by hand signal or radio. Once the engineer is ready, the water is turned on at the hydrant.

It was a warm night and I was soaked through with sweat at the end of our three-hour training session.

Being class lead this week, I was given instructions to make sure that the engine and truck had full air pack set-ups with masks, that all air bottles had been filled and that all radios returned to the charger and set to the proper channel. At first, I was failing this be doing instead of making sure that it was getting done. After making sure that my air pack was cared for, I got busy making sure that my team knew what was needed to be done before we were excused. Do better next time.

Monday, October 15, 2018

The Firefighter Academy--Day 3

I hurt this morning. Really hurt. Not like I got hit by a car hurt, but just a good over-all ache that follows a solid day of work. You wouldn't think that just getting into and out of what amounts to heavy winter clothing over and over again would do that to a person. Yet, the body was doing it's share of whining this morning. I spent some time doing yoga stretches to work the kinks out before heading back over to the fire station for another full day of training.

I was able to beat the two-minute time required for donning full turn-outs and air pack. Just beat it. In subsequent timings I did better, but forgot pieces of equipment like the Nomex or my helmet. Sometimes I would get my gloves all the way on and realize that I forgot to put on my helmet, which means that I had to back out my regulator, put the helmet on, put the regulator back onto the mask--with heavy gloves on. In the end, I was getting faster at the process.

The Captain said something today that really struck me. That during an emergency a person doesn't rise to the occasion, but rather sinks to their level of training. Looking back on my life, I could see how this idea rings true.

Gladly, we moved on to other things today. We spent more time and detail in getting into and out of the truck. Even in the big ladder truck, where there is lots of room it's a choreographed process getting four people into the back with seat belts on. Add an air pack to each of them on the way back out and it gets fun. Using a smaller truck and it's like two families of kids fighting over the available seats in the back of a 1970s station wagon.

Ladder fun was next. How to carry them, stand them, lower them. With one person. With two people. Hint: communication is key.

More knots. It felt like a Boy Scout meeting.

The afternoon was spent learning how to load 200 foot of inch and a half hose into space that allowed for it to be pulled out in a usable fashion. Load the hose. Pull it out for deploying into a structure. Open the nozzle (the most fun). Shut it down. Tear it down. And, do it again. And again. And again.

Nozzle techniques. How to advance with a charged hose. How to control the hose easily over a long period of time. A charge hose has a lot of energy and can be really dangerous if not controlled.

After a tour of the burn building, where we will be spending a lot of time learning about the dynamics of fire and how to control it, we did a short overview of the fire hydrant and how to connect feeder hose to it.

An important lesson at the end of the day was the cleaning of the firehouse. Emptying the garbage, sweeping and vacuuming the floors, making sure everything was picked up and put away. The fire station was going to be ours too and we need to take pride in it.

I gave up my "Screwed on Straight" award to another candidate at the end and was given the assignment of class lead for the following week. This new role--I'm guessing I got because I'm the next oldest on the team, because the oldest person got it for the first week--puts me at the first station in the command chain. The candidates need to come to the class lead to get permission to do anything where they are not with the rest of the group, so that someone always knows where they are at. And, they need to go in pairs: two in, two out. This is an important safety aspect, as no one is go wandering off by themselves to do something without someone knowing about it and without someone making sure that they got out.

It was a good first week.

Saturday, October 13, 2018

The Firefighter Academy--Day 2

Today was the first full day of the academy. 8:00am to 5:00pm or as we say this in the fire service, 0800 hours to 1700 hours. Whatever notation you want to use, it was a long day. By the end of the drills, I was cramping up in my hands and arms, as well as my calves. Oddly, the amount of energy put into just trying to get those infernal gloves on, especially when they were wet with sweat, was the toughest part of the drills. Yet, I get ahead of myself.

Yesterday, we began learning about how to put our "turn-outs" on and how to set them up so that they can go on quickly with the least amount of movements. Today, we built on that base by adding the SCBA unit. Before I get too far down the description here, let me describe these two pieces of equipment. "Turn-outs" are the outfit that is worn by a firefighter for going to structure fires and things like auto accidents. This outfit includes steel-toes and steel-shanked boots, heavy quilted pants with substantial suspenders, a heavy quilted coat similar to what you see on those police attack dogs shows, a Nomex hood, helmet and heavy gloves. The SCBA or Self-Contained Breathing Apparatus is an air tank on a back-pack frame and a mask that the air regulator fits onto to connect the air to the mask. These two pieces of equipment weigh about 50-60 pounds combined.


The process of donning this equipment goes something like this. You'd think after as many times we donned (put on) and doffed (took off) this stuff, that I could tell you exactly how to do it. That may be the case at the end of three weeks, but for now we're just going to go with "something like this." As I'm kicking off my shoes, I'm putting on the Nomex hood. Moving as efficiently as I can, I'm stepping into my boots. The pants are already pre-loaded over the boots. As soon as I get into my boots, I'm pulling up my pants, which are large enough to fit over my jeans without any issue. The suspenders hold up the pants until I can get them buckled with the big plastic buckle. My jacket is laid out to be easily thrown on. I'm still struggling to get the zipper zipped up without getting caught in the velcro flap, flashlight, neck cuff, etc. This cost me time in the donning process. Once the jacket is on and zipped with the neck cuff velcro'd with the sad, worn-out velcro, I roll down the Nomex hood off my head and over the collar of the jacket. This is the basic "turn-out" donning.

Next is getting the air pack or SCBA on and working. First, check to make sure that there is air in the tank. Makes sense. Then, turn the valve to make air available to the regulator. This causes all kinds of lights and sounds to go off. The regulator vibrates loudly. The secondary gauge should show the same pressure as on the tank. The lights on the heads-up display light up. The PASS--Personal Accountability Safety System??--beeps a couple of times. Once all that is checked, I can swing the pack onto my back and tighten the shoulder straps and waist strap. That done, I have to keep moving to keep the PASS thingy from making all kinds of racket and pissing everyone else off. Moving directly to the mask, I put it over my face and hold it there while tightening five separate straps to hold the thing to my face. Remember the Nomex hood? I now roll it back over my head and make sure that it's fitted around the mask. Now, my helmet and making sure to cinch down the strap. Finally, the regulator. Red up and rotate left one quarter turn. I'm now breathing from the air in the tank.

Now comes the most difficult part of the whole assembly--those infernal gloves. I have to pull so hard on these damn things that my forearms ached by the end of the day.

By the end of the academy, I will be able to do this whole process in under two minutes.

Interspersed in this donning and doffing routine was getting a feel for how breathing on bottled air works and what happens when you begin to run out of air and then what it feels like when there is no more air. Because this is a team activity, there are parts of the SCBA that facilitate getting really close to your team. In one exercise, we were all running out of air and linked together through our buddy-breathing dongles--all of us breathing on the last remaining good bottle of air. Then, it too ran out.

Towards the end of the day, we got into knot-tying and rescue drag techniques. That was a great way to end the day.

Before they let us go, I was called up to the front of the class and awarded the "Screwed on Right" award for trying hard all day and helping other members of the team. This twisted wrench below is my award for the night. I get to return it tomorrow so that someone else may have the honor.


The Firefighter Academy--Day 1

Last night, the academy began in earnest with a version of the "scared straight" process that those in prison give to young people who think it wouldn't be so bad to go into prison. Our version, though, was to make us acutely aware that seeing the kinds of stuff that you are most probably going to see has the probability of taking a toll on your mind, body and soul. This toll can easily spill over onto your family and friends. And, that you need to be aware of this possibility and guard against it with disciplined daily actions, vigilant awareness, and consistent post-event evaluation. Then, when that isn't enough, there are several layers of peer support and professional counseling. Are you still sure you want to do this, Jay?

It was sobering to listen to the statistics that more in the fire services commit suicide than are taken in the line of duty. Those numbers are consistent across all first responder roles. The numbers for alcohol and drug abuse and abusive actions towards family and friends follows in the same vein. It's something to think about. I have endured more stress throughout my life than I cared to for sure. Not always adjusted for it in the best ways either. What makes me think I can do better here?

Yet like the moth to the flame (maybe not such a good metaphor), I seem to be drawn to help where I can while I can. I may only have a few years of this type of activity left in me until my body no longer cooperates, so why not give it my best shot. I know that I'll increase my physical toughness from soft to stale marshmallow hard at the very least. I'm hoping that I'll learn some new skills to build my mental toughness from "fragile flower" to a level where I don't cause any pain and suffering to those I love.

Friday, March 30, 2018

Building the Plan

I attended a "Pub Talk" last Wednesday put on by the Florence Chamber of Commerce, the Small Business Development Council of Oregon, Lane Community College, and something called RAIN (entrepreneur network of some sort with a convoluted name). This Pub Talk was the first in a series after the pilot last Fall and I found it most useful.

The RAIN dude, David, a young man with a lot of know-how on business models, walked through the Business Model Canvas with us using various examples and then challenged us to complete one for ourselves. I found a good template at https://strategyzer.com/ that matches the one that David used.
https://assets.strategyzer.com/assets/resources/the-business-model-canvas.pdf  is the template and https://assets.strategyzer.com/assets/resources/designing-crystal-clear-business-model-canvases.pdf is a guide for completing it. 

When asked if anyone would like to share their roughed out Canvas, I shared mine. While it seems like a fairly simple business--a vendor cart that sells custom ice cream sandwiches--all the elements are there as there would be for a larger business.

The Value Propositions or "what you do for each customer segment" would be:
  • Provide a small range of custom ice cream sandwiches that are made with local ice cream and cookies to the crowds at the local Florence farmer's market and street fairs, and for local delivery to neighborhoods.

The Customer Relationships or "how the customer interacts with you" varies with each customer segment:
  • At the farmers' market or street fairs, customers would approach my bicycle/tricycle ice cream cart and make a choice from the 3-4 options laid out on a chalkboard and purchase that choice with cash. (credit/debit?)
  • Though a website and/or Facebook schedule, allow delivery orders for specific ice cream sandwich types for specific neighborhoods on specific days of the week. Based on a production schedule, certain types of ice cream sandwiches would be created. 
  • For local scheduled events, such as meetings, parties, weddings, etc., a pre-arranged selection and amount of custom ice cream sandwiches would be provided for a set price. 
Channels are specific means to market to my customer segments and how I'm going to get the product to them:
  • Street fairs and farmer's markets would be advertised on the Facebook page and local Facebook pages to announce where I planned to be and when. The sandwiches would be sold from the freezer on my tricycle. 
  • Deliveries to the various neighborhoods would be on a schedule. For example, Coast Village and Florentine Estates on Monday, Greentrees on Tuesday, etc. Individual orders would be packaged up and there would be some extras for those who stop me along the way.  I would deliver on my tricycle. 
  • The tricycle would be used for local weddings and events, where it was possible to ride the tricycle there. If business improved, maybe a trailer to haul the tricycle around might be an idea to pursue.

https://lanesbdc.com/wp-content/uploads/2018/03/SBDC-SPRING-SCHEDULE-2018-FOR-WEB-1.pdf

https://strategyzer.com/


I'd like to say that it was the realization that I was selling something to people that was not good for them that gave me a change of heart, but what it probably really was was the look on Keith's face when I tried to explain that I wasn't really interested in making money or working that hard. I guess it was an insult to the struggles of the small business person who is putting in the long hours to make her business a success that I really didn't want to put in those hours anymore. Like it would be easy for me. Either way, I'm going to put this dream away for right now and see if I get serious about working hard again.

Saturday, March 17, 2018

Things Rarely Go Exactly As Planned

There is a term in the project management world that I think is one of those terms that are such good metaphors for life. The term is "progressive elaboration." My take on the definition as I taught to project management certification students was that every project needs a plan, whether that plan was just a rough outline or a detailed spreadsheet full of minute steps. But, just as important as the plan is the understanding that the plan will change. The reason that it will change, no matter the amount of detailed planning, is that our perspective changes as we move into the project. We begin to see things that weren't visible before. Opportunities that weren't on the table when we were planning are presented to us. Roadblocks that weren't even near the road during the planning are now front and center.

My plan to build and to run an ice cream bicycle/tricycle was more on the rough outline end of the planning spectrum. More, actually, into a just-an-idea realm. This was by design, as I wanted to see what the process was going to throw at me and just roll with it.

On Thursday, I began taking my first steps into the plan. As I was returning from taking the computer that Pam's mom left us to the repair shop to have reimaged, I stopped into the Florence Chamber of Commerce and began asking questions about how to start a business in Florence.  This led me to the executive director's office--she had just walked in with her two little doggies--who gave me the name of a guy at the city who was in charge of getting new business owners through the process. I left him a message once I got home. I found out that the city offices are in the process of moving to a temporary building so it might be a few days before I get a return call.

The second stop on the way home from the computer tech was BJ's Ice Cream at 29th and Hwy 101. I had heard from the other store downtown that this location was where I should do my asking. The young gal didn't know when the owner, Keith, would be around, but I was welcome to write him a note. As I was taste-testing a scoop of Oregon something or other that had blackberry swirls in it, I wrote Keith a short note about my business idea to give him the opportunity to choose whether he wanted to talk to me or not.  Just as I was about to pull into our driveway, which is about three blocks away, I got a call from Keith. We talked for a bit and he seemed excited about the idea, as it's one that he has had for awhile, but didn't have the peoplepower to make it work.

The change that I am wrestling with is that Keith has a 3-wheeled Cushman, such as the one pictured below, and a cold-plate freezer that goes with it that he mentioned could be part of the deal. 
1970 Cushman--not the actual vehicle

While I still want the bicycle/tricycle to be part of the plan, I don't have the capital to make that happen right at the moment. Leasing the Cushman from Keith might be a solid way to see if there is a market for custom ice cream sandwiches and enough of one to earn the capital needed for my bicycle/tricycle.

Sunday, January 28, 2018

Seattle Cycles' MetroBike Electric Folding Bike

 Information about the MetroBike

I was able to spend several days at the Consumer Electronics Show (CES) in Las Vegas early this month (Jan. 2018) working with Mike Yap of Seattle Cycles and his new bike design--the MetroBike. This is a bit of a review and admiration for this lightweight, electric-assist, folding bike.


Uses for this bike

Every bike has a purpose. A reason for its design. This bike's reason for being is having a well-designed, balanced bike that is a joy to ride. It is a good-looking bike that who's attractiveness is derived from its clean lines and simplicity. It is electric-assist to allow it to be a useful vehicle without getting the rider overheated. It is folding so that it fits into small spaces easily.

Let's work through the many scenarios where this bike would be useful.
  • Vanpools--it is not necessary to take a car to meet your vanpool no matter what the terrain looks like. Your bike folds neatly and fits in the storage area of the van without hogging all of the storage space. Once you get to the office, it either be rolled on the back wheel and frame wheels into the office. If you have a small distance to go to get your office building, it can be quickly set up to ride that distance in comfort. On the way home, you may be taking a long way home.
  •  Metro Bus--it is an absolutely wonderful development that many metro bus lines have adapted and put racks that can hold two or three bikes on the front of the bus. This has helped with the first and last mile problem that riding a bus alone posed to commuters. The problem is that its success has created another problem--not enough bike rack space. It is almost a given that if you're in a hurry the bus you need to ride on will have full bike racks when it reaches your stop. Having a folding bike allows you to fold your ride to something the size of a pieces aircraft standard luggage and carrying it onto the bus with you. That way you make it to where you need to go on time. With this bike being light, you are able to lift and carry it easily into the bus. 
  • Train--even though Amtrak is trying hard to recognize that bicyclists could be their best customer base, they aren't known for being focused on the customer or moving quickly on any aspect of their business. Folding bicycles kind of slip easily into a space that is made for a normal piece of luggage and Amtrak can deal with that. Things get complicated when you have to hang your bike on a rack in the luggage car or you have to pack your bike into a big box that has to be wrestled into the luggage car. Now that you know that you can get your bike on the train without an incident at the ticket counter, plan your next road trip by train.
  • Small Plane--the problem with airports is that they usually aren't placed in the part of town that you want to be visiting. Sure there is Uber and Lyft and taxis, but why let your adventure stop once you land? This folding bike will fit into the tiny cargo area of your small plane but will provide you with a nice ride to wherever you want to go once you get the wheels on the ground. 
  • Business Travel--there is only so much the hotel workout room can do for your well-being. And, after a couple of days, it feels more like a cell than somewhere you really want to be. If you bring your bike with you on that business trip and you've got something to look forward to after that long day of meetings or better yet before your day even begins. 
  • RVing--instead of towing that small car behind your motorhome, bring your bikes. With your folding bike onboard your RV, you'll have a nice ride wherever you stop. And, it will be clean, dry and ready to ride.
  • Direct Commute--it's a folding bike, but  it's also a real fine riding machine. One that folds and can fit under your desk.

 
Jay Guettler and Mike Yap

Design Elements

  • Integrated Motor
    • All of the motor control and sensing circuitry is sealed in the hub along with the motor. This sealed package keeps the electronics safe and dry no matter what the weather and riding conditions. It also keeps the operation and maintenance simple.
  • Flexible Battery Solutions
    •  Everyone's regular commute is going to be different. It may be flat or have a good deal of hills. The person may be 120 pounds or 220. You may not need to carry anything more than your cell phone and keys or you may have a couple of panniers full of stuff. Weight, terrain, needed speed to be traveling, and how much effort you're able or willing to put into the commute is part of the equation of how much battery energy you're going to need. 
    • Battery current is measured in Amps. Current is the "juice" flowing out of the battery. The amount of current flowing from a battery over an hour is an Amp-hour--this is how batteries are rated. Voltage is the amount of "pressure" that current is under. The more voltage, the more "pressure." Watt-hours are the Volts times the Amp-hours.
    • A small water bottle sized battery configuration provides about 215 Whr (36V x  6Ahr), a tall water bottle sized battery will provide around 300 Watt-hours (36Volts x 8.3Amp-hours)
    • A 250-watt motor ran at full out for 1 hour will require 250 watt-hours of stored energy. It is unlikely that you will be running your assist motor at full out unless you are climbing a large, steep hill.

  • Front Wheel Stability
    •  Many small wheel bicycles have an inherent instability or twitchiness about the front of the bicycle. For a long time, riders and designers believed that characteristic to be caused by the small wheels. Large wheel bicycles (26" for example) tend to be easily ridden without having hands on the handlebars. With smaller wheel bicycles, this tended to be a lot more difficult. 
    • It turns out that it wasn't the small wheels after all but the rack or angle of the front forks. Having a steeper angle on the forks (more straight up and down) on the smaller wheel bikes made them more stable and easier to ride without having hands on the handlebars. Whether you plan to ride without having hands on your handlebars or not, a more stable bicycle is easier and more of a pleasure to ride.
  • Smooth Rideability with or without Electric Assist
    •  Can the bike be joyful to ride even without the electric assist being available or just not engaged? All motor-assist bicycles, by definition, can be ridden without the electric-assist being engaged, but some of them feel more than a bit clumsy without it. This bike is designed to be a smooth, joyful ride even without the electric assist.
  • Rolling Wheels for Easy Rolling when Folded
    •  Even at a weight in the low 30 pounds, it's easier to move the folded bike around that doesn't want to fall over if you let go of it for a moment. The wheels that are attached to the rack mounts on the frame allow the folded bike to be easily rolled around and to remain in an upright position when you stop without you having to hold onto it.
  • Brake Type Flexibility
    •  Like a lot of things bicycle, there are differing schools of thought on every aspect. Brake type debates still rage on and it becomes a matter of preference of which type each rider wants to have. The design of the bike includes the frame and fork mounts for both rim and disc brake systems to be installed.
  • Motor Regen over 15-20 mph (??)
    •  The chosen hub motor systems for this bike have the ability to create battery regeneration when it senses that you are not pedaling and yet going over 15-20 mph. (I could not find the motor specs and this capability needs to be confirmed)
  • Accommodates a Wide Range of People Sizes
    •  The low single member frame design allows for a wide range of rider sizes on the same bike. To make the adjustment between individual riders and their riding styles, the seat post, and handlebar stem can be adjusted to accommodate smaller riders (5'4") to larger riders (6'4").
  • Standard Componentry
    •  By using standard bicycle components, the cost of maintenance is reduced at the same time making it easy to make modifications and customization based on the owner's requirements.
  • Drop Outs for Fenders, Front Bag Mounts, Rear Racks
    •  If your riding requirements include having fenders, the drop outs are there for you to add standard 20" fenders. The drop outs for the rolling wheels are there to accommodate the addition of a rack. If you would like a front frame-mounted bag, adding a Brompton bag mount gives you access to their full range of stylish accessories.
  • Tire Sizing Flexibility
    •  Through recent testing on tire sizes, the idea that you have narrow tires in order to reduce rolling resistance has been dispelled. To take advantage of larger tires--up to 2"--the frame design and brake components were sized to allow for the space needed for the larger tires while working just as well with the narrow tires. http://www.bikeroar.com/articles/why-you-must-run-wider-tires-on-your-road-bike
  • Simple Controls
    •  Simple controls are easier to navigate while riding. The simple motor controls consist of large red LED numbers 1-5 indicating the levels of assist that you wish to have. Levels 1-2 for the flats and normal riding. Level 5 for serious hill climbing. These are set with a simple +- switch operated by your thumb.
  • Stress Tested Frame for Safety
    • Not all bicycle companies put their frames through a comprehensive stress testing--these bikes were as part of their design process.